Purple Test Dress
Back in the Day
To start this story we have to go a long way back in time to far away year of 2023. The success of the green dress from the year before was still fuelling my endeavours (and to be honest still to this day) and I had already decided I was going to make an amazing Opel Marble dress one day. What's an Opel Marble dress? well a dress made from some amazing Opel Marble latex I bought from Yummy Gummy of course. Someday I'll have to show it off here. But back to the story at hand, I spent a lot of time trying to figure out a Princess Cut pattern. Pattern making I find is one of the hardest parts of making these clothes. While I'm slowly getting the hang of it, I've still got a lot to learn and what I do takes time and effort. Oh and don't forget the trial as well, and that's what brings us back to this dress, the intent is two part, one a pattern test to make sure I'm happy with it before using my very fancy material, and two, well I wanted a bit more of a casual latex dress. Because this is one of those stories I'm recalling from the past, I can't tell you my exact thought process of why I picked purple for it. I do very much like this Metallic Purple from Radical Rubber, and I thought I had enough to make a full test from it... ah you noticed I said "Thought" there huh.... yeah... I was wrong but we'll get to that part.
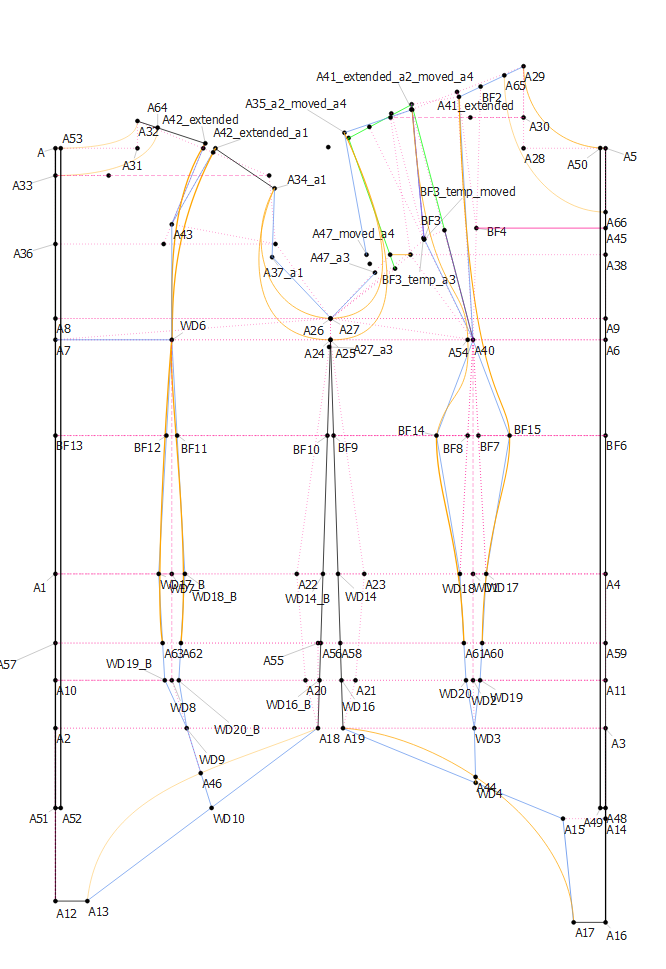
This is the pattern I ended up with and I don't expect any of it to make sense to you, it barely does to me most of the time. I have tried to colour code different sections to make it easier for myself as most of it is various lines to then build into other lines and other lines and so on and so forth. Once you separate out the bits you're after it looks much simpler, like this!
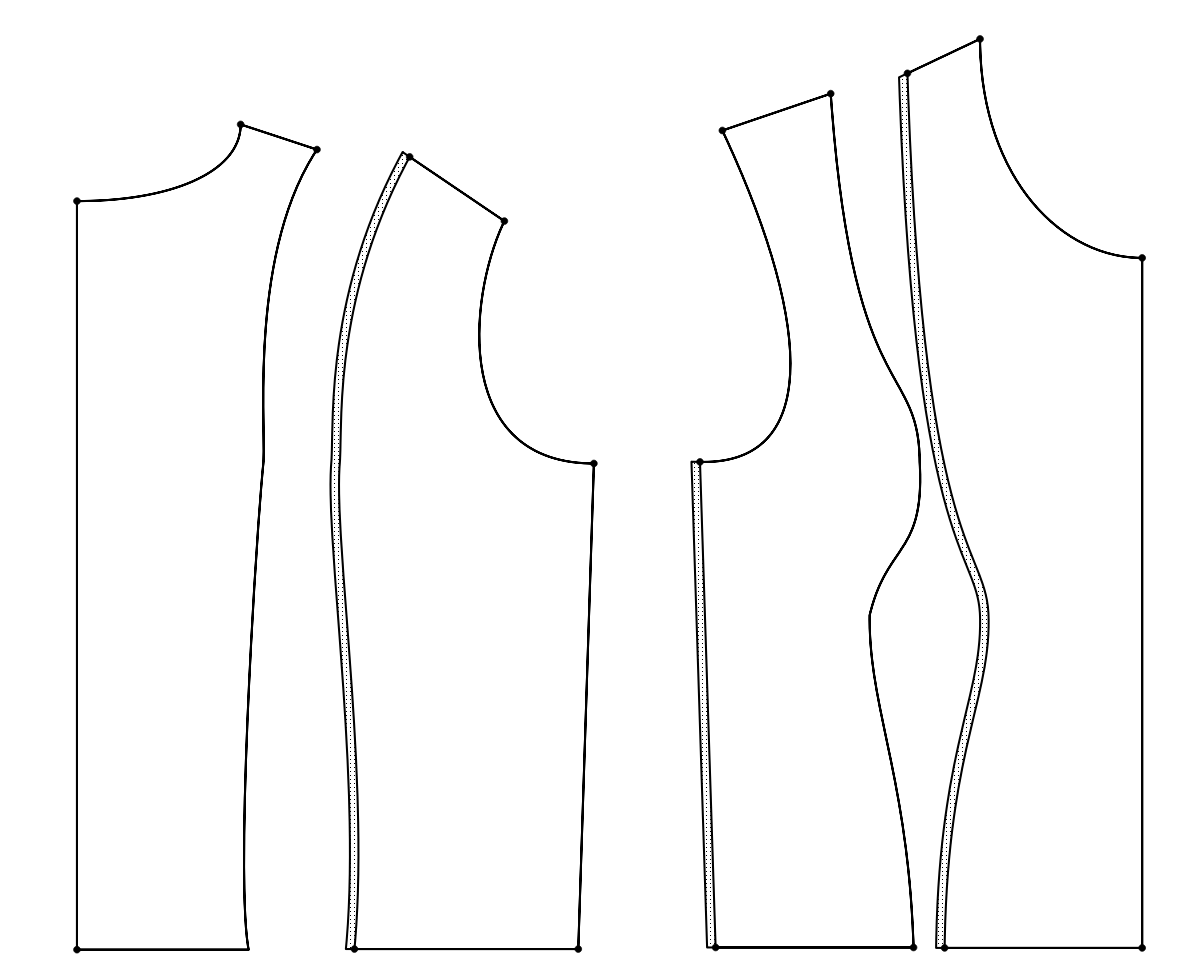
Here we have the 4 pieces of the dress, but you may ask, that doesn't look like all of it, and you're right I don't have the skirt in here because I was lazy and made it in another piece of software which totally didn't come back to bite me in the arse. The torso pieces shown here all get duplicated and flipped as right now it's only half a body's worth. I never found a good way to do that in Seamly2D (the software I'm using for the pattern making) but did find I can easily import the files afterwards into Inkscape and duplicate them over and merge ones that need it. I did try this in Adobe Illustrator for a while when I had access to a license, but that actually shrunk all my pieces by about 30% without me noticing for ages, which meant I couldn't figure out why my pattern tests were going so wrong. Eventually I figured out it was Illustrator, though still don't have any idea as to WHY it did it, so I just swapped back to doing it in Inkscape. So I take the two centre pieces for the front and back of the torso, double them over and merge them together to make a single piece that will be cut out. The side pieces for each don't really get touched here as I can just duplicate and flip them in the laser cutter software shortly.
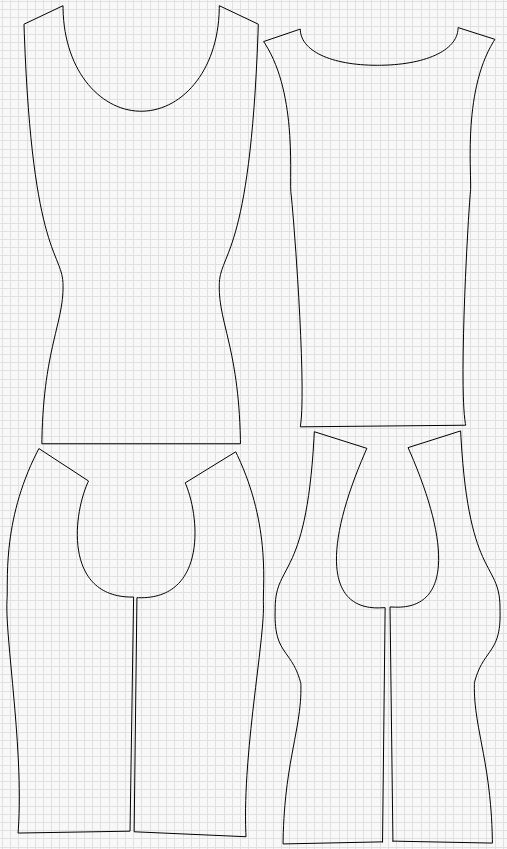
Oh that was quick, so here in Lightburn (laser cutter software) I duplicated and flipped the other 2 side pieces, and also made a basic circle skirt. I don't think I've actually specified in here yet, but what I'm making is a Skater Dress. A circle skirt is simple to make, work out an inner diameter where it goes around your body, and add what ever length you need onto that to make another circle further out. Cut it up a bit because that's too large to fit in my cutter (or rolls of material) and that's all there is to it!
Chop to it
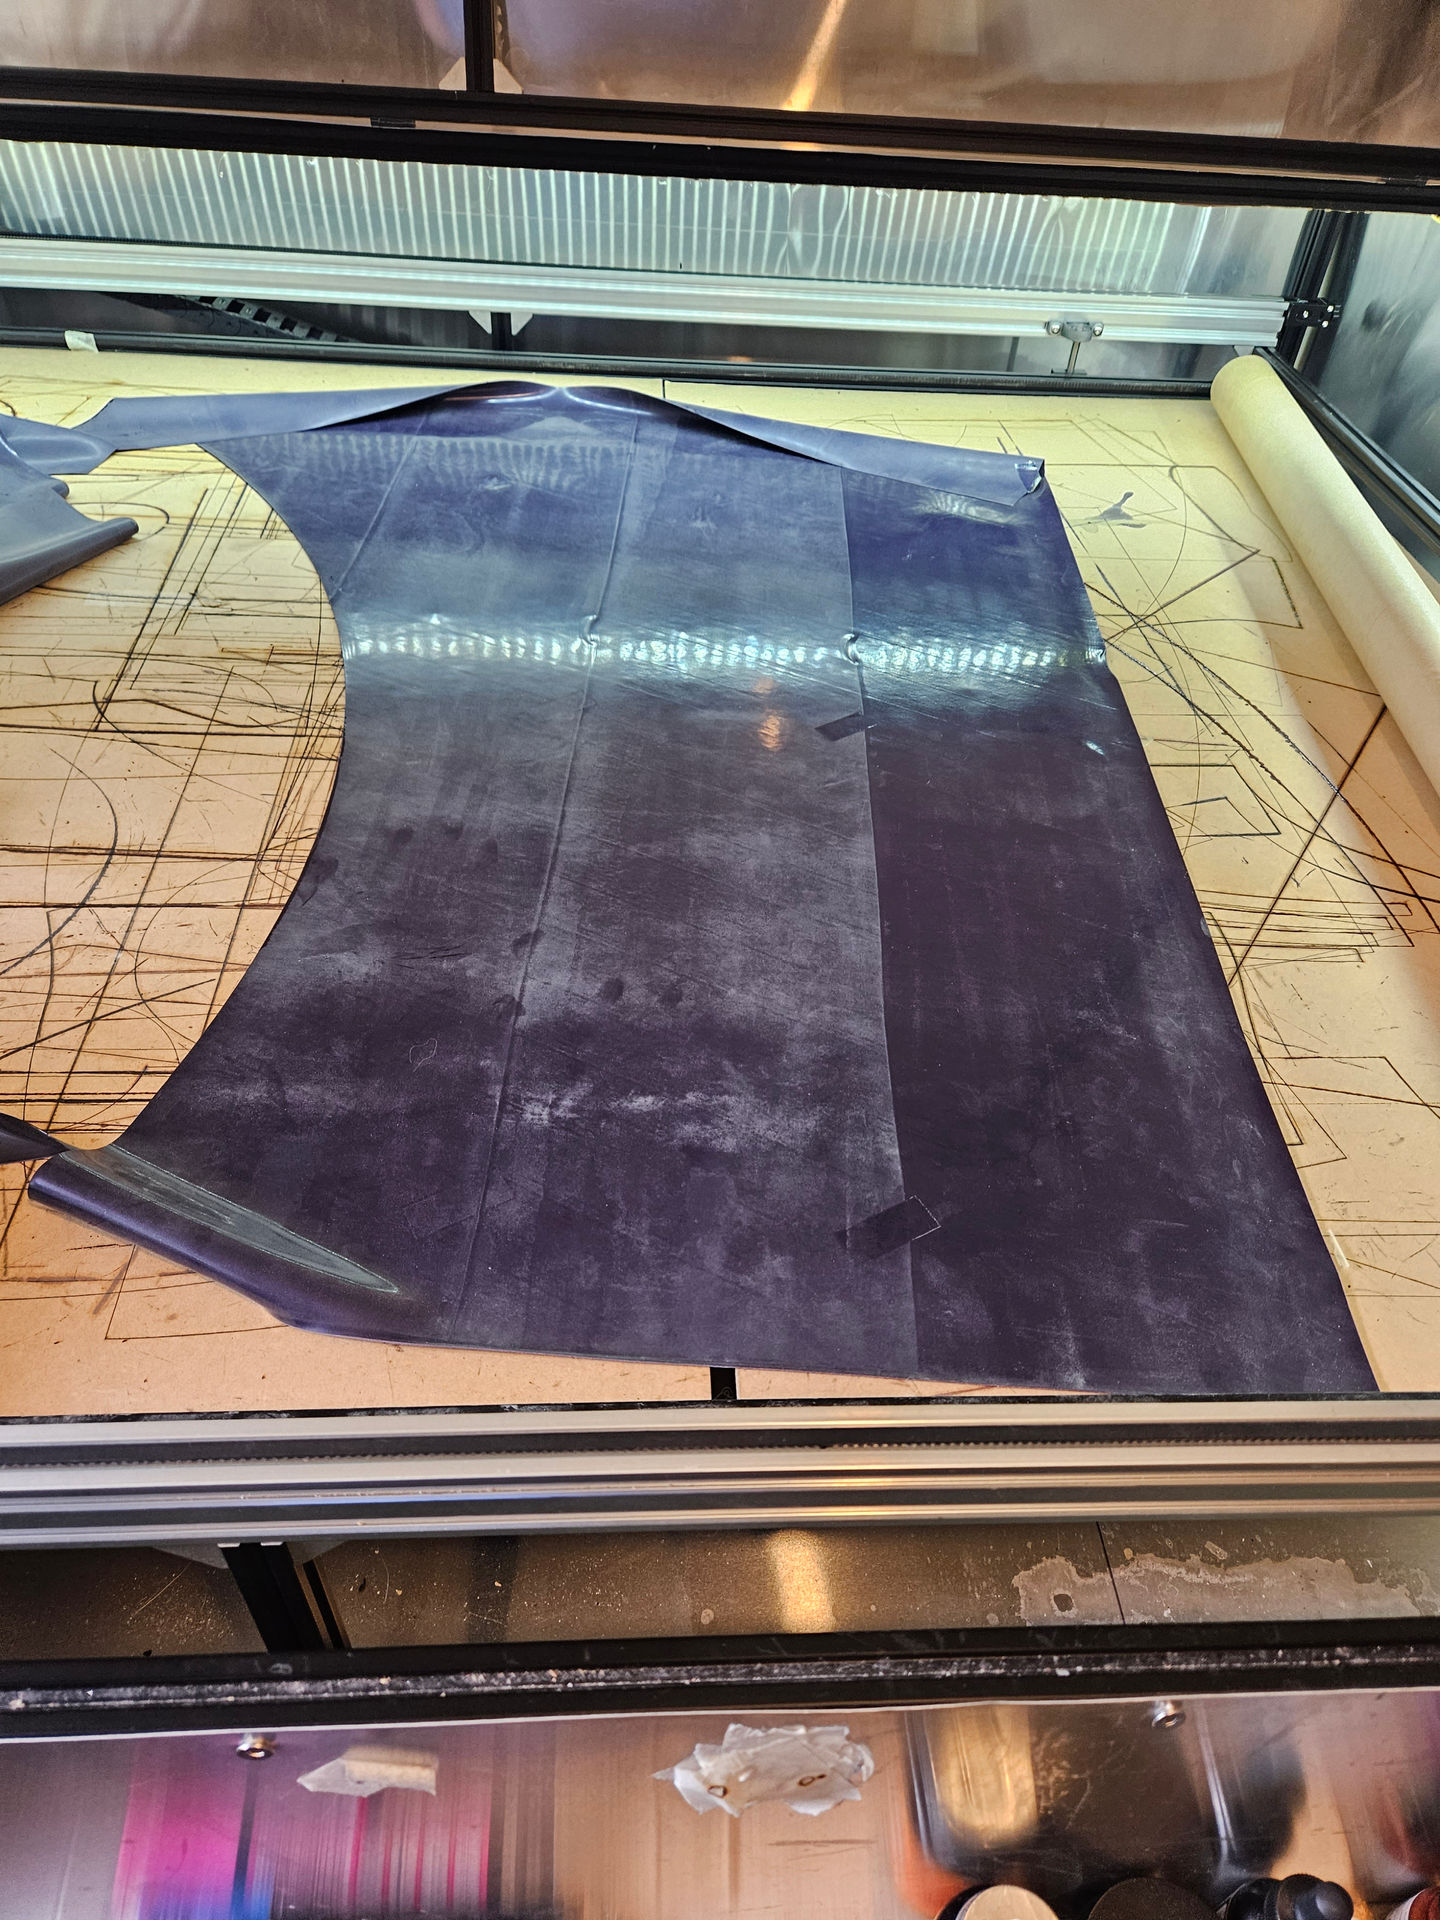
After I have the design and all the parts are in Lightburn, all I need to do is line them up with the material on the cutter, and tell it to start cutting. The laser cutter has been a massive help for me in these projects as it cuts out (heh pun unintended) so many steps, I really gotta do a post about it one day.
First thing I cut out is the 8 pieces of the top because they are smaller and easier to fit around the rough edges from when I last used the roll of material, then I moved on to cutting out the skirt. Now the skirt pieces are biiiig, that's the price you pay for a full circle skirt, but they are totally worth it. They are so big I can only cut out 1 at a time, so I cut the first one, move the latex on the laser cutter and line up the second. While doing this I notice that there's not much left on the roll and I start to hope that there will be enough. Once the second pieces is cut I unroll some more and... oh no.... There is not enough for a 3rd.
 This was the only roll of the Metallic Purple that I had, so at this point the project went mostly on hiatus until I ordered some more material. But because I order the material from the UK and shipping is expensive, I tend to try and only do a bigger order occasionally, last one I did would have been 2019.
I did assemble the top of the dress at the time and try it on, found a few things to tweak in the pattern, after all this is the point of testing it. These changes made it into some other garments I made during the hiatus, such as a swimsuit (wow another thing I need to show off here).
This was the only roll of the Metallic Purple that I had, so at this point the project went mostly on hiatus until I ordered some more material. But because I order the material from the UK and shipping is expensive, I tend to try and only do a bigger order occasionally, last one I did would have been 2019.
I did assemble the top of the dress at the time and try it on, found a few things to tweak in the pattern, after all this is the point of testing it. These changes made it into some other garments I made during the hiatus, such as a swimsuit (wow another thing I need to show off here).
Back to the Future
So here we are back in 2025, the new shipment of material arrived some 6 or so months ago and this project has still been sitting on the back burner waiting for me to get motivated. Funny enough one thing that I've found has been helping my motivation is actually writing this blog! So thank you to all of you who are reading this as it gives me even more enjoyment for my hobbies.
During this time the pattern for the top half has had a few refinements, nothing too major, mostly just making the curve over the chest smoother as I had a problem with it poking out too far. But it was enough that I decided I'd re-make the top even though I'd have the old test around here somewhere.
As I had a clean start to the material being a new roll, I thought it would be best to cut the 2 big remaining circle pieces first and then move onto the new top half. This also allowed me to start assembling the skirt while the top was cutting.
Assembling the skirt is easy, it's 4 pieces all with straight edges to join, that really is about as easy as it gets. While assembling it I was thinking something might be looking a bit off, but it's been a while since I made a circle skirt so I didn't really question it much. Once it was all glued up I did what anyone would do, and went to put it on to see how it is and well.... have a look for yourselves
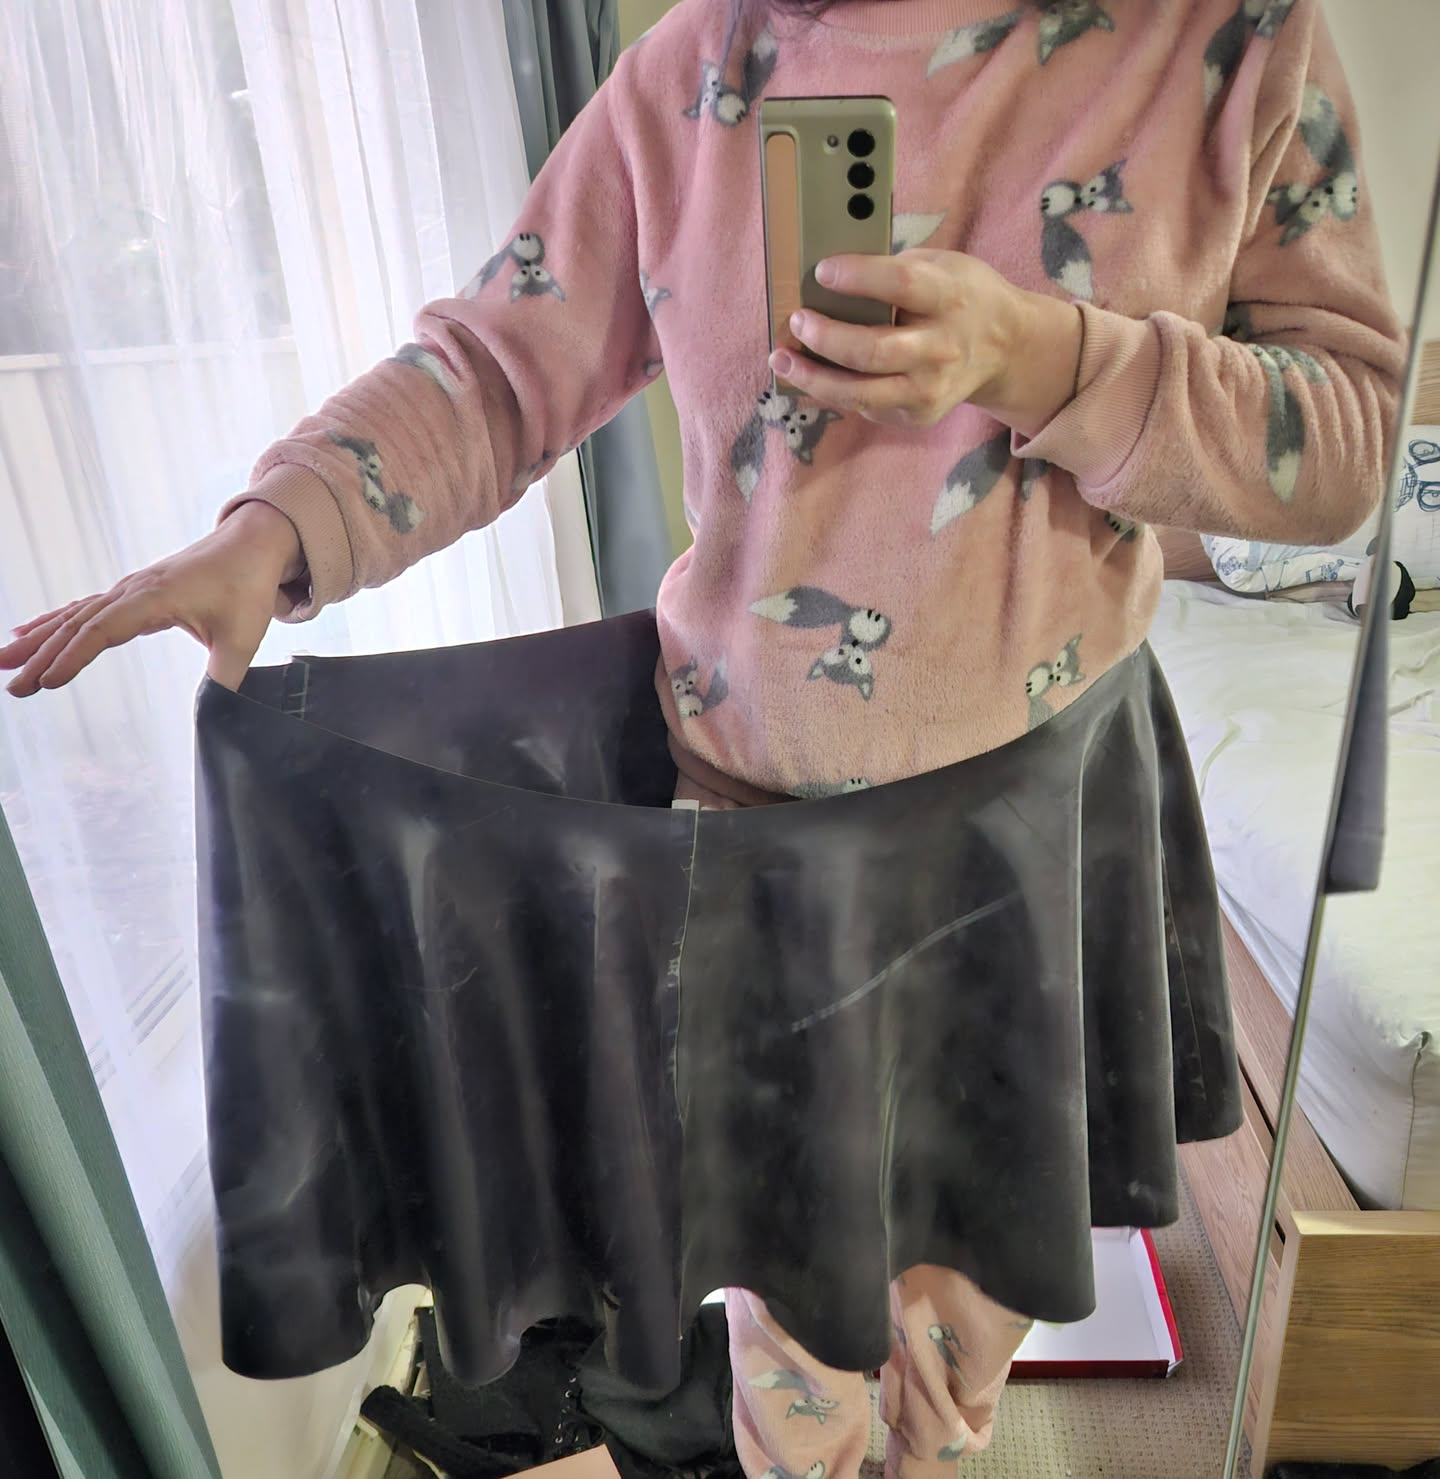
It's giant... the inner hole is about twice as large as it should be... how did I do this? what happened? Honestly I had an idea in my head pretty quickly as to what I did wrong way back in 2023 when I made the pattern, and when I got a chance to sit down in front of the software again I was able to confirm it. I had mixed up circumference and radius. While I needed the skirt to be a specific circumference to match the piece that it's joining on the torso, when I made the design I didn't then convert that into radius (and you thought this was a waste of time at school) and use that in the design.
 Obviously I should have done this, and that's what I have now done to correct my mistake but it does mean I'm left with that giant skirt. Which I guess leaves the question of what I'll do with it, well after this project I'm basically out of Metallic Purple again but those skirt pieces can be cut up for smaller items. No specific plans as of yet but I guess it goes on the scraps and oddments piles which let me tell you, really build up over 10 years.
So now while I was cutting the 4 new skirt pieces I did the opposite of before and assembled the top so it would be ready to go. I can never get things to line up perfectly even though they do, it must be a bad habit of managing to stretch it slightly when gluing them together. So after assembling I trimmed the end so it was all an even curve to attach the skirt. All the 4 skirt pieces got assembled with some similar issues and trimming in a couple of places. This then leaves the fiddly task of joining the two together, it's really not that bad, it's just a fiddle as it's basically 2 circles joining together where you can't easily get at all sides. One issue I've had before which I probably mentioned with the green dress is these 2 circles not being the same length and having to stretch one out to match. But this time I did a much better job with my planning and that didn't really have to happen (ok to a very minor degree but it barely counts).
And I guess what comes next is the reveal of my new dress!
The Reveal
 I'm actually really happy with how this came out and it definitely has proven to be a valid test for my fancy material. I'm glad I did it on something like this first considering all the trials it went through. Even when putting it on for the first time it just went on so easily, I guess I just got the fit that right for me which is also amazing. The green dress for example used a blouse pattern I found on the internet that wasn't sized for me so not a perfect fit, but this one was fully designed for me.
I write the end of this as I'm sitting in a hotel in Berri the day after I finished it, and wore it for the first time and to be honest, I'm just eagerly awaiting a chance to properly wear it out. Heck the photo above of the final dress hasn't even been taken yet as I want to get a nice one for it. At some point I may still add some little sleeves to it, but as of writing this I'm a bit conflicted if I should or not. I'm someone who's quite self conscious about my broad shoulders so that's part of the reason I'm considering it. Anyway, I should leave this here as I have a pizza I need to go pick up!
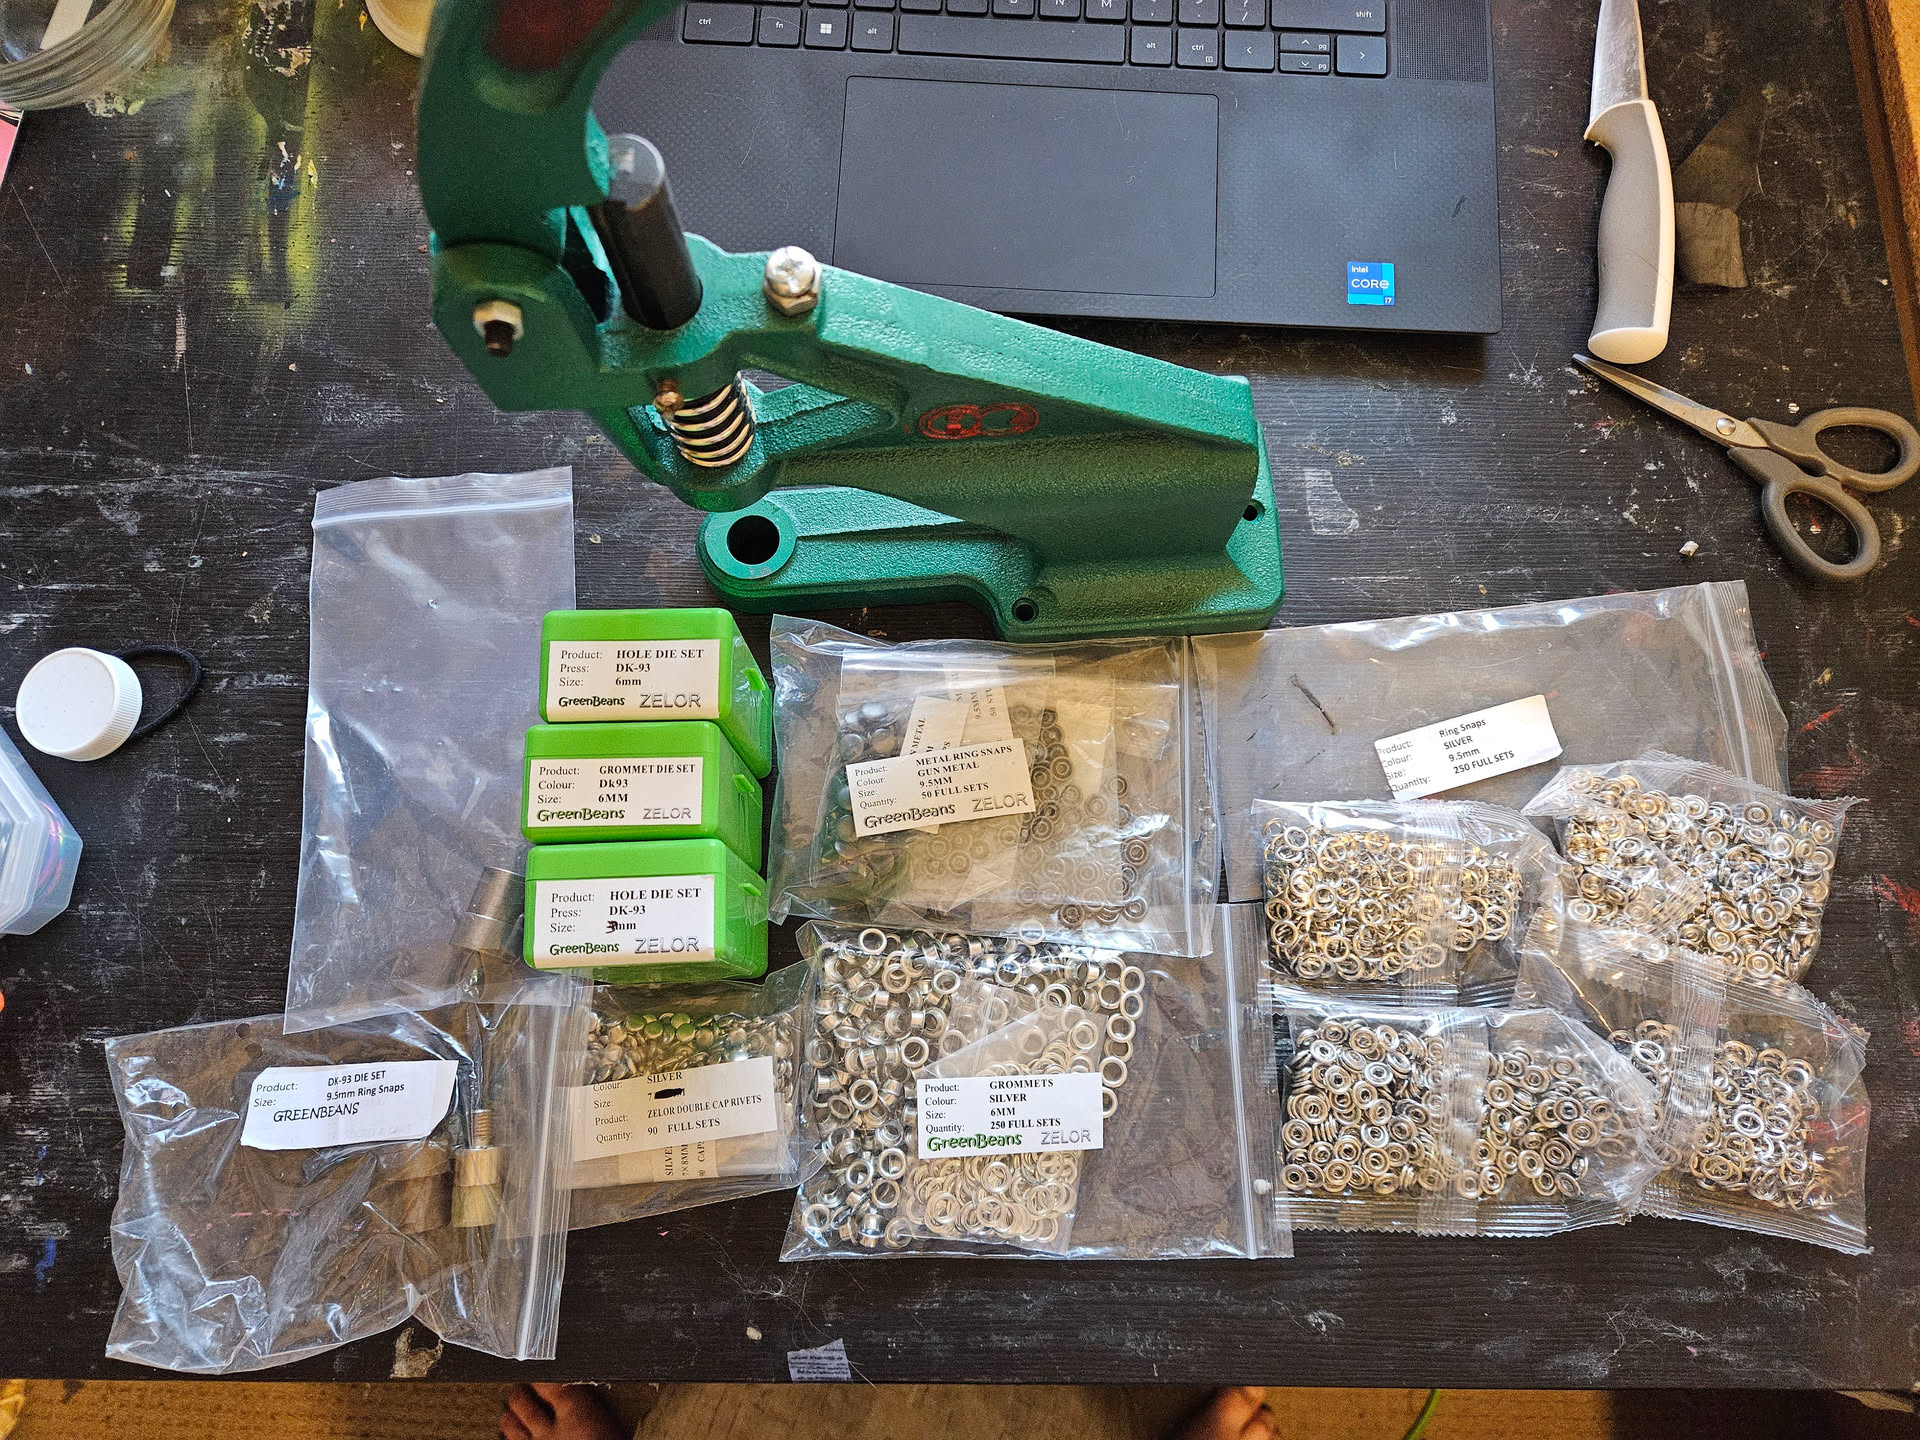
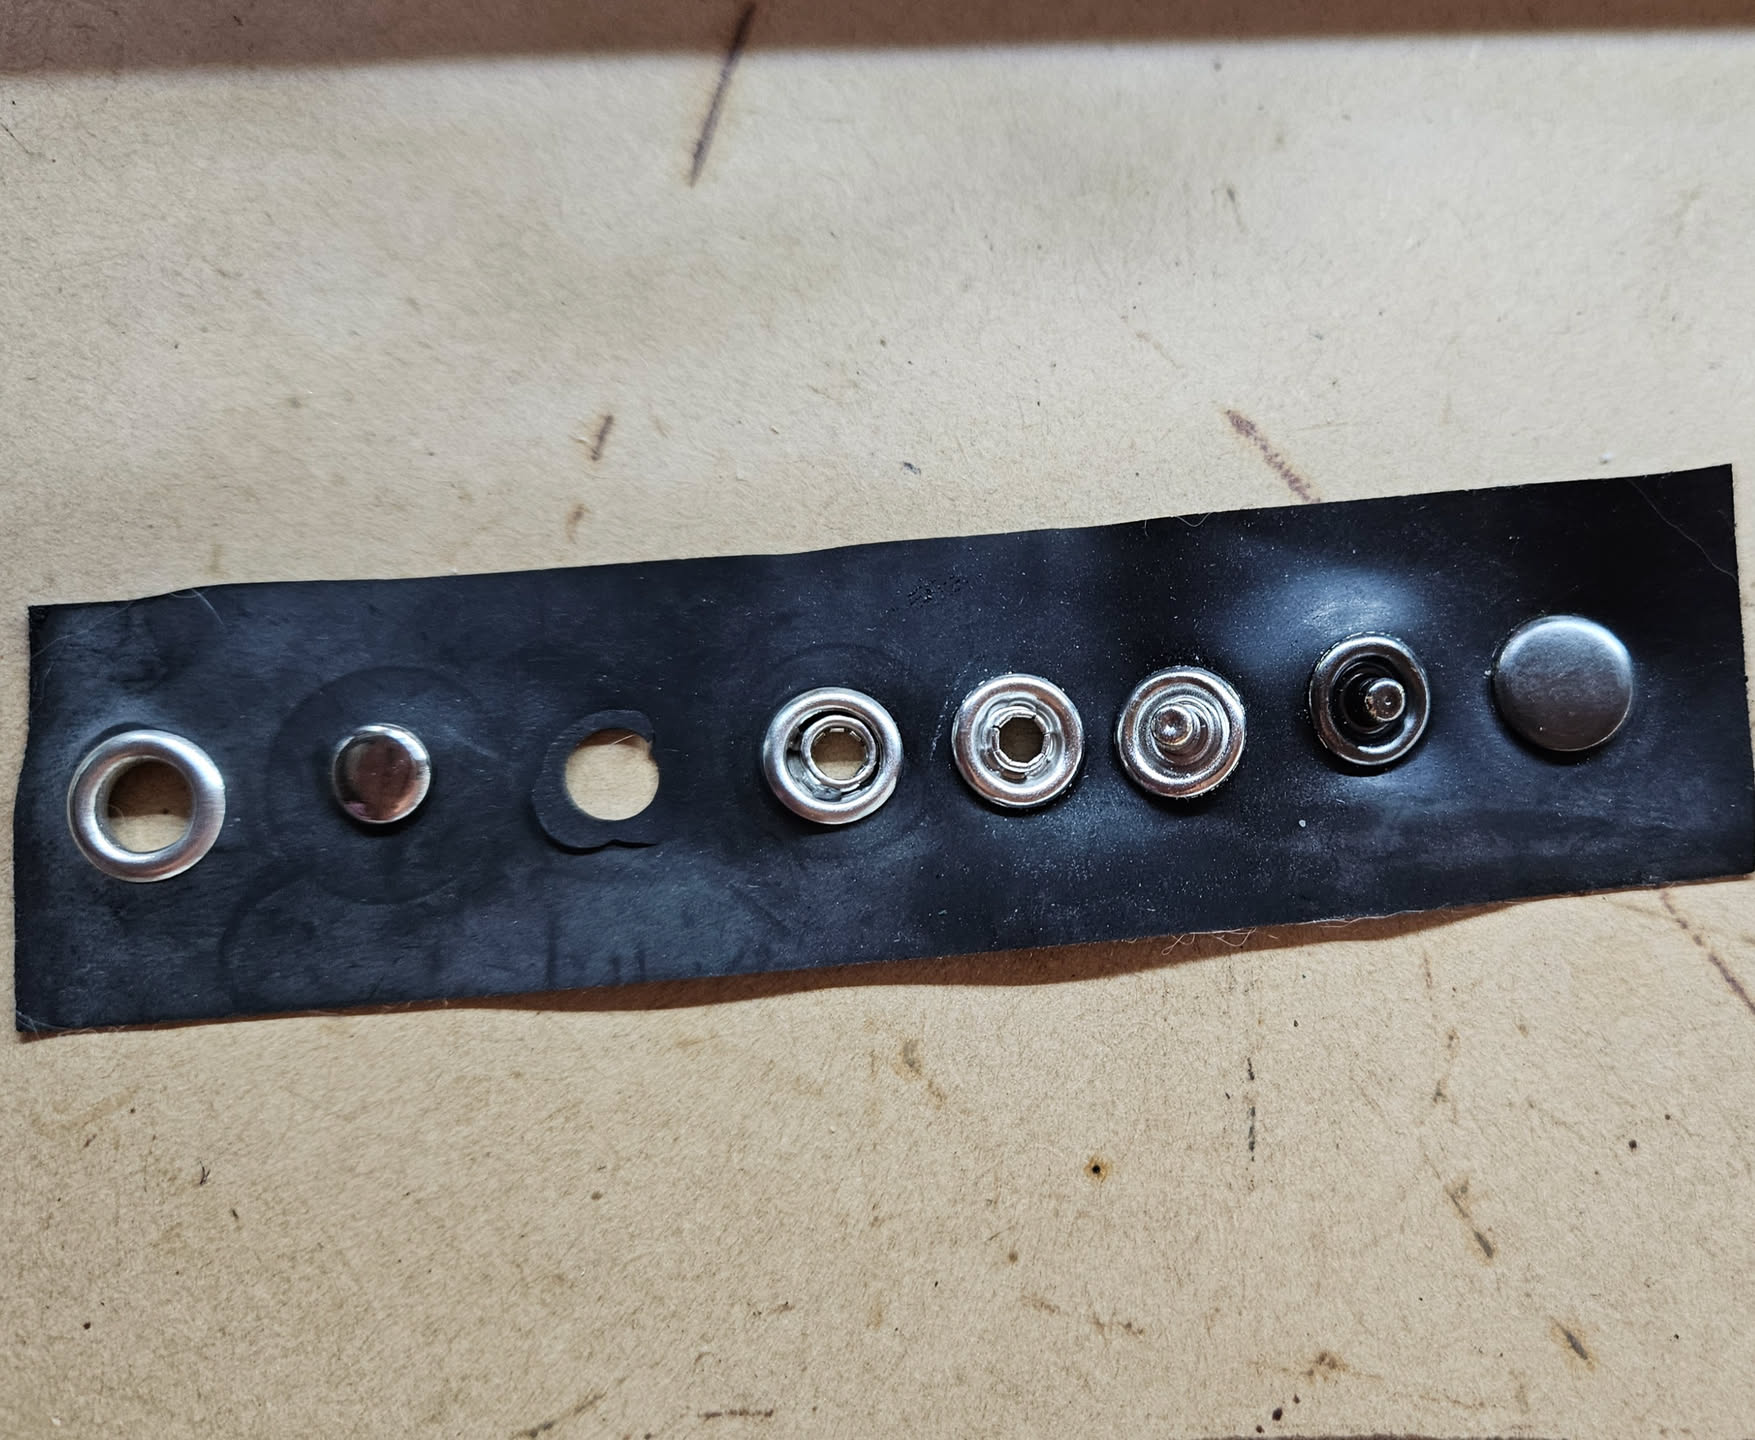 So in order of left to right we have
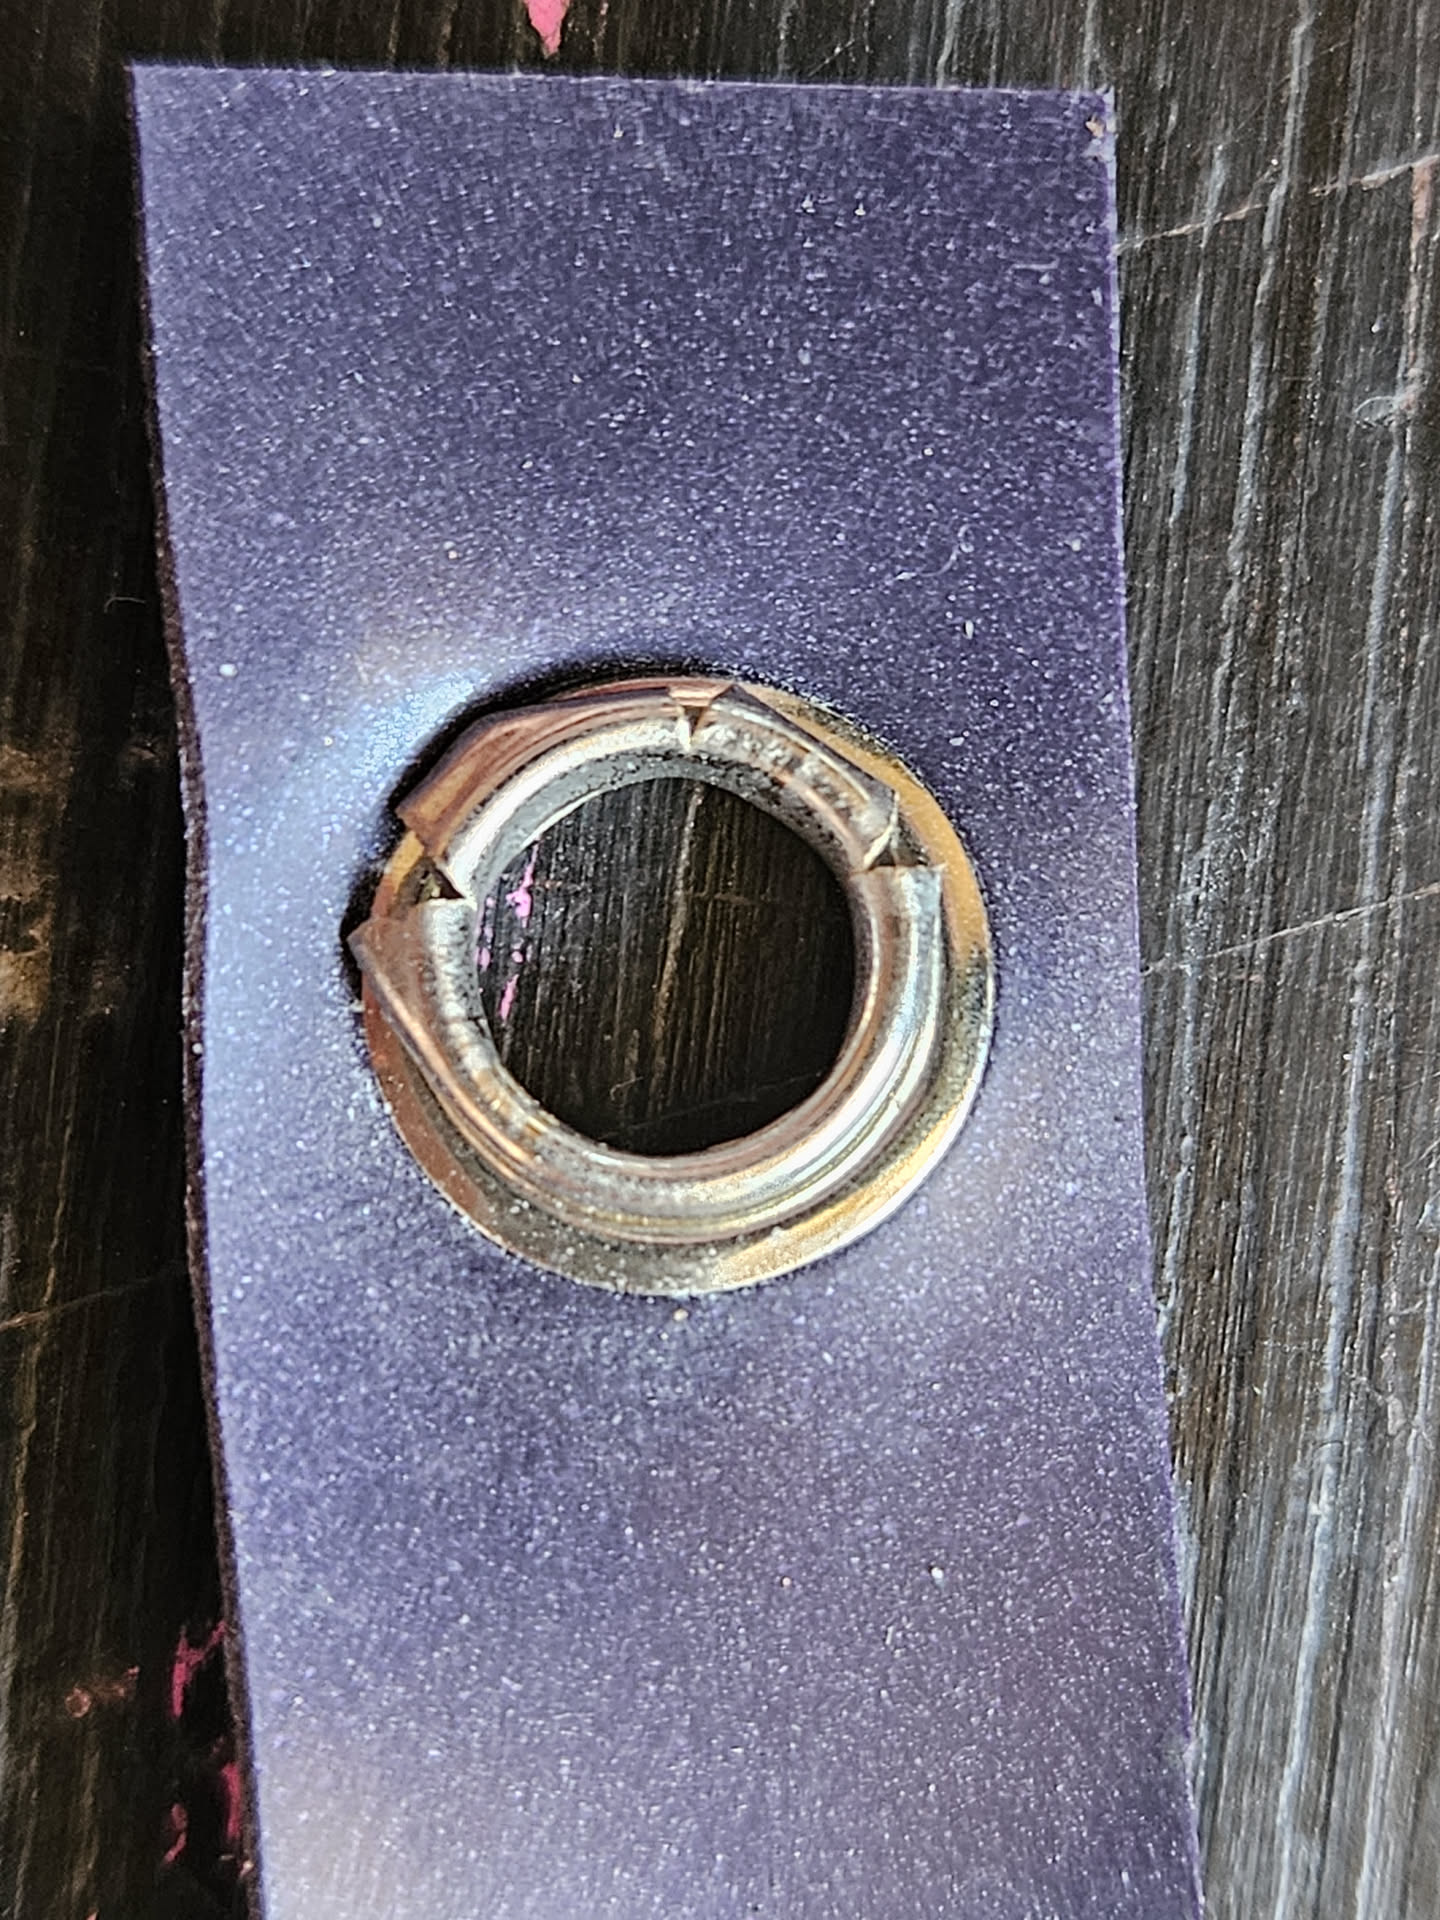
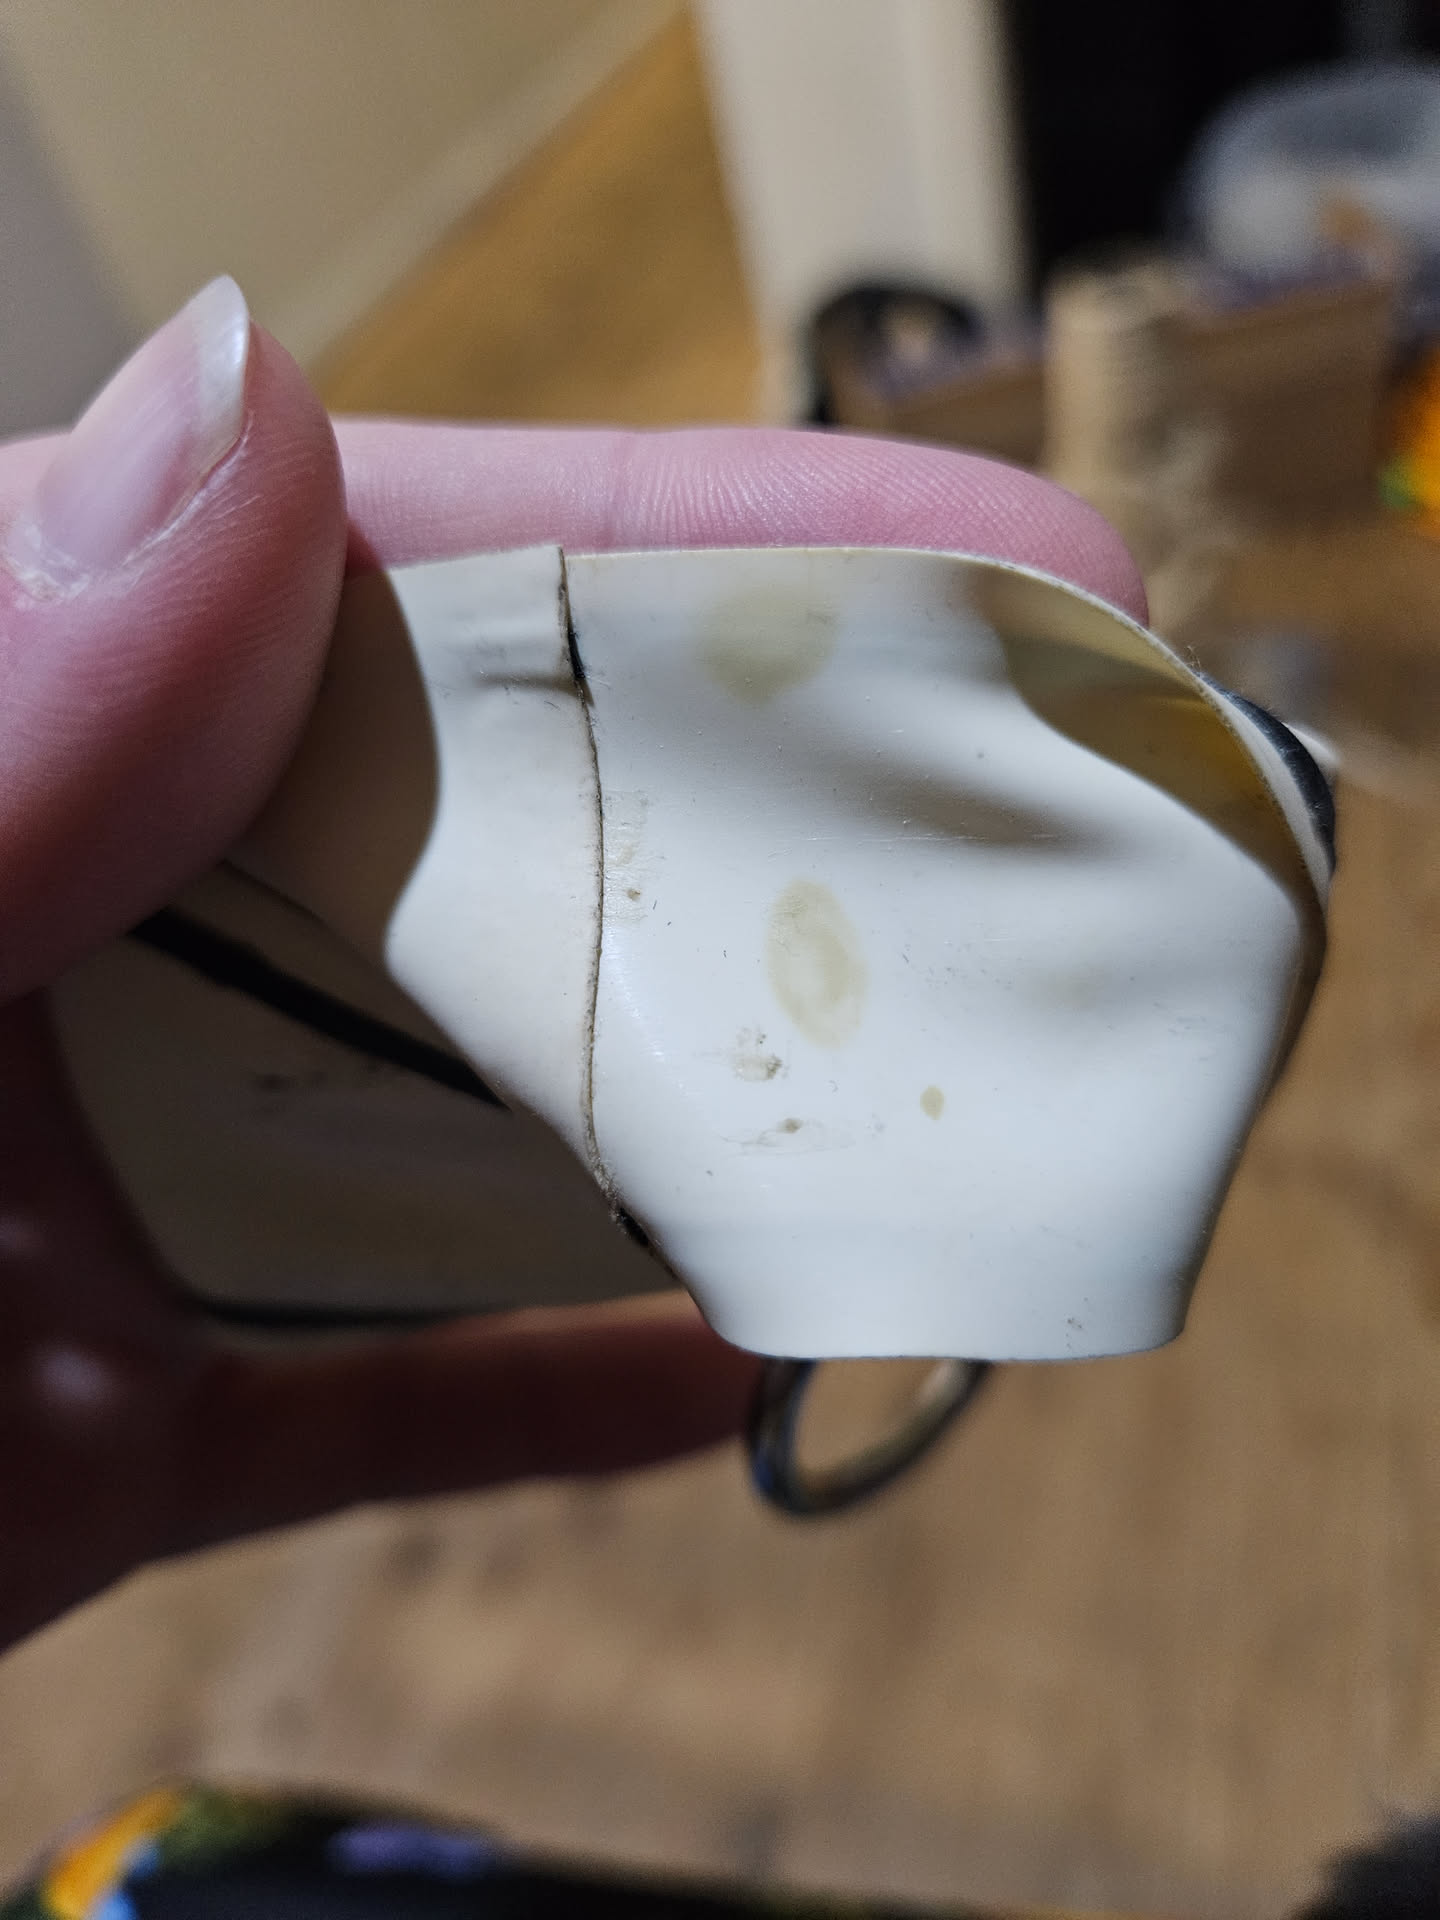 One problem I had found when looking to purchase these parts is so many places don't even state WHAT they are made from, and it seems what I've bought here is not safe. Potentially the materials are mixed in my lot so I'll try the other styles I have on some white scraps as well (white makes it very obvious) and see how it goes. Worst case scenario is I have ones to use for non-latex projects but I still have all the tools ready for some new safer ones in the future.
I'm sure part of my limitations with finding safe ones are having fewer options of where to buy from here in Australia compared to other places in the world. The shop I purchased them from had a hefty sale as they are shutting down, so that also encouraged me to go there, but hey, atleast the tools were discounted too.
There will definitely be more poppers and rivets in my future crafts, even if there is a slight delay to get some more, so stay tuned for that!
One problem I had found when looking to purchase these parts is so many places don't even state WHAT they are made from, and it seems what I've bought here is not safe. Potentially the materials are mixed in my lot so I'll try the other styles I have on some white scraps as well (white makes it very obvious) and see how it goes. Worst case scenario is I have ones to use for non-latex projects but I still have all the tools ready for some new safer ones in the future.
I'm sure part of my limitations with finding safe ones are having fewer options of where to buy from here in Australia compared to other places in the world. The shop I purchased them from had a hefty sale as they are shutting down, so that also encouraged me to go there, but hey, atleast the tools were discounted too.
There will definitely be more poppers and rivets in my future crafts, even if there is a slight delay to get some more, so stay tuned for that!